Showing posts with label storage. Show all posts

Clever storage - 5 ways...

It's been a slow process, but I've now learnt that the key to keeping things tidy is to have good storage systems in place. Well, that and selling my children. Here are 5 clever storage solutions in kids spaces. Ideas people! Here for the taking!

1. Custom built beds.
A great way to maximise storage in the kids rooms. Not only does a custom design like this utilise all that under-bed space that usually goes to waste, but it creates space that kids can access easily and teaches them to be responsible for their own tidiness. And if you're thinking it looks expensive, think again. A decent cabinet maker should be able to put something like this together in your home for a price on par with most new single beds... Check your local classified section or ask friends for recommendations of carpenters and cabinet makers they've worked with or know in our area.


2. Bins!
These lovely white bins are from Ikea. They go for about $29 and I can tell you - they're great toy storage. We have one full of Lego Duplo. The boys actually love packing away when they finish playing because of the resounding tinny crashing sound the lego makes as it goes in the bin... You can use them for just about anything, soft toys, cars, dolls, dressups...


3. New space.
Again with the customised bedding option, but this time it's in a converted roof space! I'm dying to do this to our place. It's a big job converting your roof like this and can be expensive. But the beauty of this project is that it can be broken down into stages. Fitting an attic ladder - not too hard... Putting down some blue board for a floor - doable. Insulating - foul but achieveable... and so on. Okay, there's a bit more to it in some cases, but you get what I mean right? Call in the big guns for the bits that are too hard to tackle yourself. Take your time and be patient and before you know it you'll have a huge extra room to play with! It'll add value to your property and maybe even save you having to move!!!


4. Way up high
Don't discount the rafters! Creating storage that goes right to the ceiling saves you a dust trap, makes a great display area and it's safely out of reach of wee ones for delicate bits and bobs or things you don't need to access often. We have a similar situation in the boys room and this is the spot where we keep their memory cases - they have a vintage suitcase each filled with baby photos, tickets to football games and wiggles concerts and the like...


5. Divide and conquer.
Open shelving is a good solution for large areas. A shelving unit like this does double duty as a vast storage space as well as dividing the sleep area fro the play area. Attractive cane baskets store toys in categories (until the kids mess it up again), and you can even custom make the fabric liners for these to coordinate with your room decor. For example, you might want to line the baskets to match your Frankie Sofas!

7 stylish toy storage ideas

Gorgeous rooms ahead! And all cleverly organised with beautiful storage ideas. Look out for the stunning wall art on the last shot too.


Stylish storage for all that art!

If you have kiddos, you know what I'm talking about when I say "all that art". We've got boxes full of the stuff! It started with shoe box sized boxes. Once we filled a couple of those I thought the problem required a bigger solution so I bought a few of those really big ones from Ikea (each one is equivalent to around six shoe boxes), but even they're filling up fast and the boys aren't even at school yet! Well, I've come to a couple of conclusions... 1. That I need to be a bit more ruthless curating the collections, and 2. If we have to keep this stuff (which I do treasure but need to whinge about occasionally), we need to find a prettier way of storing it. Soooo....
Good idea huh? Three good things I can think of about these immediately. 1. Boys won't be able to open them. 2. They'll only hold so much (which will make me be a more ruthless curator). And 3. They'll store more easily than huge boxes! I'm sold. This is on the list for the next trip to Officeworks.

Kids only mudroom

Oh the decadence! A mudroom at all is something to behold in Australia (especially here in Sydney's Inner West!), but one dedicated to the kiddos is beyond comprehension! And tell me, how do they keep that living room so clean and white with wee ones in the house?

The perfect mudroom

This shot reminds me of those quizzes that used to be in the sunday papers - you know the ones, where you'd have to spot things in the cartoon? Well, this one, you have to spot all the incredible storage ideas... there's at least six that I can see - and those sunglass shelves are number one! How fantastically gratuitous!? We don't really seem to have "mudrooms" here, but I think they're a fabulous idea - especially with kiddos. If I had one it'd look a lot like this... with more boxes.

Wall to wall storage

While I'm not a massive fan of the amount of exposed timber in this room, I do love the amount of storage! When you take into account the size of the little people who live here and how small their clothes are, there's enough storage in those walls for all their toys as well! And the concertina doorway to an identical sib space next door is fantastic! The cost of a custom design like this wouldn't be minimal of course, but the results look a million dollars...

Love is a loft

With living spaces in city dwellings becoming smaller, the loft bed is a stylish and practical solution to the ever growing issue of shrinking bedrooms. Here are 4 kids rooms filled with great space saving ideas done well.


Images via Pinterest

Book Keeping

Books books books books books. They can be the essence of childhood - all those tales, adventures and lessons to be learned through favourite characters who have lived through generations. But how to store such valuable treasures? To give them the respect they deserve, make them accessible to the kiddos and keep them tidy too! Sounds impossible doesn't it? It's not. It just takes a little bit of inspiration and a dash of organisation, both of which I've got for you right here! Now go, be inspired and create wonderful libraries for your wee ones to enjoy!


Lego: Store & Display

Here's a stylish display solution for Lego - printers drawers! The lovely vintage typographers trays are ideal for showing off all those "delightful" little bits of molded plastic that can often be found strewn across the floor (well, my floor anyway), and they're much safer up on the wall like this than under my shoe acting as a skate. (Do I sound jaded? It's been a long day - sorry.) 

You can often find these on eBay or Etsy too. Here's a couple of links... 
You can see how lovely they are and how you choose to decorate them is limited only by your imagination!

DIY Wall storage tubes

This looks great and it isn't too hard to do. It's one of those projects that leaves you with a good sense of gratification when you've done it.. I'm definitely giving this one a go. Here's the step by step...

1. Purchase two, four-foot-tall cardboard tubes, one measuring 10 inches wide and the other 12 inches wide. Use a jigsaw to cut each tube into smaller tubes of varying heights (refer to the photo above for guidance). I've also seen similar heavy duty cardboard cylinders at Reverse Garbage that would work just as well and would probably be even cheaper.

2. Cover the outside of each smaller tube with contact paper. Cut away any excess paper with a utility knife. 

3. Arrange the tubes on the floor as you'd like them to hang. Wherever two meet, use an awl to poke a hole through both. Slide a no. 10 washer onto a 6-32 x ½" bolt, push the bolt through both tubes, slide another no. 10 washer onto the bolt, and secure with a nut. Fasten all the pieces together in this way. 

4. To create load-bearing braces, slide a piece of wood that's at least an inch thick underneath one of the topmost tubes. Trace an arc along the top half of the tube's interior onto the wood. Measure down two inches and draw another arc that connects to the first, making a crescent shape. Repeat for all the tubes on the top row. 

5. Use a jigsaw to cut out crescents from wood, following the shapes you drew. Drill a hole into the center of each shape. 

6. With a friend's help, position the tubes on your wall. Use a pencil to lightly trace the top arc on the wall, along the interior of each topmost tube. Set the tubes aside. Place a brace so it aligns with one of the drawn-on arcs, then stick a pencil through the brace's hole to make another small mark on the wall. Drill a hole in that spot, then tap in a plastic anchor until it's flush against the wall. Repeat with remaining braces. 

7. Align the hole in one brace with the corresponding anchor. Using a drill with a Phillips-head bit, screw the brace to the wall. Repeat with remaining braces. Set the tubes onto the braces. 

8. At the back of each supported tube, just above the brace, make a pilot hole with an awl. Fasten the tubes to the braces using ¾-inch screws.

Ikea hack: Display storage for the kiddos

Looks great doesn't it? Try the Ikea Prant box. They are raw ply so easy to paint and only $14.99 each -you could knock one of these display walls together yourself for well under $100 including the paint! All you need is a handy hubby or some basic drill skills... 

Clever Chalk Storage

I love it. It's repurposing, recycling and reinvention all rolled into one!

Make it: Pencil Tins

Start saving your empty tin cans people. You too can make these little pretties. 
Imagine them in a cluster of contrasting papers on your hall table? Feeling inspired yet? 
Perhaps you might like to do this with them...

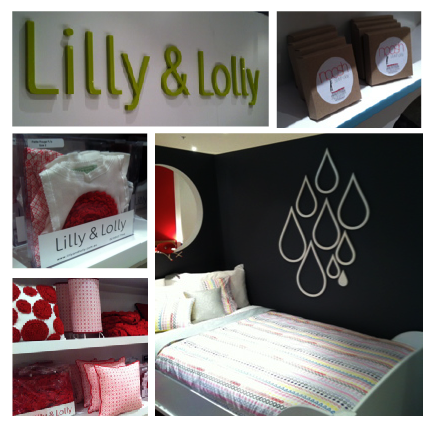
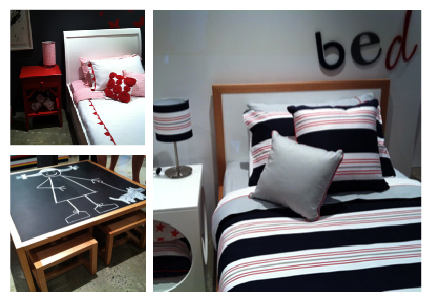
Noosh: Now available at Lilly & Lolly store in Sydney!

From today, Sydneysiders can get a shopping fix of their favourite kids decor brands together in one concept store! That's right! Lilly & Lolly have officially opened their doors at the deliciously designer PYD Building in Waterloo - and let me tell you - it's just divine. L&L's Ashling and Megan have outdone themselves - the store looks incredible.  But the most exciting part for us Nooshies is that L&L called us to ask if they could stock Noosh! Take a look!
...and more Noosh Gigi Alphabet 

Clever pram hooks

Here's one of those "I wish I'd thought of that" ideas... Meet the BuggupSo simple. So clever. These hooks make life with a pram so much easier when it comes to storage. I tend to keep both of ours in the car unless we need the space to move something huge. But when it's not in the car, it's sure to be under my feet or close behind me sprawled across the hallway.
  Sadly, not available in Australia (don't you hate that?). But if you have a mate in the states they're available from Giggles Stores nationally (in the US) for a mere $30US! 
Related Posts Plugin for WordPress, Blogger...