In our house at the moment there are a couple of obsessions going on. Hugh is obsessed with maps and globes (how on trend he is!), and I (as always) am completely absorbed in a world of DIY. So that makes this project that I found on OhDeeDoh just perfect for us to tackle. Hop over here for the full instructions.
Showing posts with label DIY. Show all posts
The Block 2012 - Team Sophie & Dale WIN!!!!
Hurray! Our favourite couple finally won a room!!!
It's about time those judges recognised style when it smacked them in the face!
Congratulations Team Sophie & Dale! Well deserved.
Here's a tour of the rooms and a special treat - I have links to the shops Sophie sourced her stylish pieces from (including that secret decorators source!!!).
Adore the "Noodlier" - from Grant Dorman Interiors
And did we love Sophie's suitcase drawers? - from Mill Markets
The desk... from Scout (what an amazing vintage furniture source this is!)
Vintage bedside trouble light, also from Scout
That exposed brick wall looks fantastic. I had an identical hall entry in my old house with one wall exposed like this and would you believe I hated it? But those uplights set into the floor really make a feature of the brickwork and give it a whole new dimension. Oh hindsight.....
Coat rack from Izzi and Popo
One of my favourite wallpaper designs ever... from Radford Furnishings
Vintage book artwork, created by Sophie from an old book picked up at Mill Markets
The Jackalope head is from Urban Attitude I love the sense of whimsy it gives the room.
The blocks are from Spacecraft
And credit must be given to Sophie for her patience in finding a set of vintage suitcases that work together aesthetically and fit in those spaces! As well of course for the initial concept which is just brilliant! The suitcases were found at Mill Markets
Dear little button-eyed bunny is from Spacecraft
I'll do a roundup of the other 3 rooms and sources later in the week. But for now lets be happy
Team S&D have some money to create more wonderful spaces!
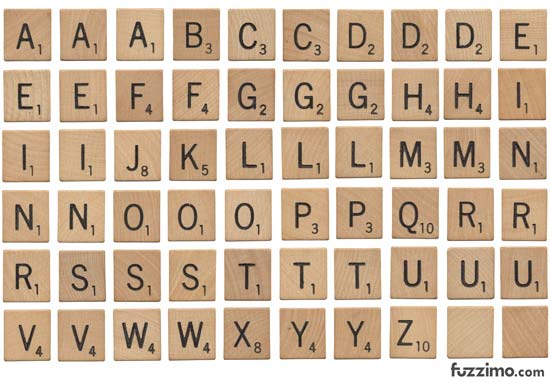
Free Printable Scrabble Letters!
Gorgeous? Oh yes...
Want to make it yours?
Click on over here for free printable scrabble letters and DIY away...
DIY: Circus Big Top Pinata
Over the weekend Hugh and I decided to have a go at making a pinata for his birthday party. Why make one and not buy one? Why not? Generally, I find making things like this so much more gratifying than just going out and buying it, and "doing it yourself" is a way of thinking that I like to impart to my boys whenever I can. Besides, you end up with exactly what you want instead of having to compromise to what's available... so, in the spirit of all things "circus" we couldn't think of anything better than a big top to model our creation on. Here's a step by step tutorial of how it came together...
1. With an old corrugated cardboard box broken down flat we made a cylinder and fastened the join with masking tape. 2. using the cylinder as a guide we traced a circle on a second piece for the bottom and taped it al together with masking tape. 3. Cut triangles from the leftover cardboard and tape them together to for a cone and tape to the top of the cylinder (there are 8 triangles in the shot below but we took one off to leave an opening so we can later fill the pinata with goodies). The number of triangles you'll need will depend on the diameter of your cylinder. We didn't use any measurements but made it up as we went and it all worked fine...
4. For the decoration we didn't have any crepe paper so we used red and white laser printer paper - either will work well. Cut strips of paper about 7cm (3") wide (we cut an A4 sheet lengthways into thirds) and then snip a fringed edge almost all the way through leaving a little bit at the top for gluing. 5. Glue the fringed strips onto the structure overlapping as you go. We started out using sticky tape for this but glue (just PVA craft glue) worked much better we learned a little way into it. 6. Using a contrasting colour (we used yellow) cut a bunting/banner type strip to wrap around the top of your walls. 7. Cut a small circle from the same colour to sit on top of your cone shape to cover up the untidy bit at the top where all your fringing joins up. 8. We made a flag from some old silver gift wrap we had in the craft box - cut into a triangle shape and wrapped around a skewer fastened with sticky tape and stuck through the tip of the cone. 9. In the name of environmentalism we poked all our scrap leftover bits of paper inside the pinata to cascade out when it gets broken party day. Voila!
Holy bird wings batman!
"My, what lovely bird wings you have..." isn't something I often hear - but that's probably because I don't have a set of these pretty puppies! I found them over at The Beetle Shack and my favourite thing about them is....
You can make them yourself!
Hmmm, they certainly look doable! Almost easy! Uh-oh, I feel a project coming on...
Click over here for the tutorial and let me know how you go if you give it a whirl...
The house you HAVE to see/Hommage to a craft maniac
Here's a funny story for you - last night while I was trawling (read: wasting time on) Pinterest, I stumbled across this gorgeous room. Naturally, being such a sweet rainbow space I pinned it immediately to show it to you... The funny part is coming...
When I went to the source to check it out (because it's a really groovy little NZ blog called Mousehouse - you should have a look at it!). To my surprise, what I found was that this stunning room isn't a room at all - it's a dollhouse! Not any dollhouse I've ever seen I'll tell you that much! Take a look...
Details in this place are paramount. The roof and exterior walls are painted in the exact same shades as the actual house the family live in...
Here's the master bedroom (it's nicer than my bedroom people!)
The bathroom... (Note the stunning papered feature wall! I think I want to live here...)
Oh my giddy aunt - there's a craft room...
Orla Kiely in the kitchen! (This woman is a crafting maniac! I think I love her!)
AND it even has electricity!!!! (That's it - I'm moving in - Megan, I'll be needing your address please!)
Now let me tell you, there are many more rooms! You haven't seen the pink bedroom! The living room! And you need to witness the entrance hall! Megan has even posted comparison shots to their corresponding "real" rooms. This is one of my favourite blog post finds of all time. You must have a look here to get the whole story. Megan, I am in awe of you. You've done the most incredible job and Amelie is one lucky little lady.
Patch me pretty...
Normally not much into the patchwork thing myself. I guess I prefer to let a fabric I love "speak" for itself rather than being crowded out by a gazillion other busy patterns all butted up against eachother - but hey, that's a personal thing. But this project - well, I'm swaying....
Check out this and every other amazing project this talented little lady whips up over here.
Make your own chalkboard paint!
Did you know you can make your own chalkboard paint?!!! I didn't!
And what's the best part? You can make it in any colour you like!
It sounds pretty easy too! Check out the tutorial over here. I'm definitely going to give this one a go!
Make your own stamps for $0!
I love this! For around $5 you can visit your local newsagents and pick up an eraser and a stamp pad, take a knife to the rubber to create a shape you like and start stamping! If erasers aren't your thing, try it with a potato or anything else you can find around the house that's hard enough to hold a shape but soft enough to cut... This isn't just a great craft activity to do with preschoolers, it's an inexpensive way to make your own party invites too! Google search silhouettes in images view for inspiration and tell me how you go with it!
Get your chalk on...
Did you know a blackboard doesn't have to be black? It doesn't have to be a board either. It can be round, red and on a wall! In fact, it can be almost any colour you like! Check out the range...
These ones above are from Porters Paints...
And these ones are The Society Inc. colours from Murobond.
The grey on the bottom row is divine - it's the one I used on the boys beds... They still don't know their beds are actually blackboards - I might just die if they were to take to them with chalk! But the ultra matte finish chalkboard paint gives is unmatched by any other paint masquerading as ultra matte.
So don't be dull! Think outside the square and get your chalk on!
To die for lighting DIY idea
Oh wow! I can't gush about this idea enough. It's pure genius! I actually wrestled with whether or not I should show you y'know? I've been trawling eBay since I first saw it and can't find a globe that's right to save myself - I figured the last thing I needed was competition in bidding for one if I found it... But then I'm not one to keep a great idea to myself and so I'm sharing... But if you win my auction you better watch out!
We did it!
Not only did it work, but it was easy and it looks fantastic! It's now hanging on the boys bedroom door and they're mightily impressed with how clever their dear mum is... Brownie points come cheap here!
How to do THAT amazing crayon wall art!
This project has been all over Pinterest for weeks. I love it. But some of the suggestions of how to actually do it were a little worrying - there was no way I was going to be putting crayons inside my old pal "the glue gun"! Now there's an easy how to - check it out over at Whatever.... I'm off to buy us some crayons and a canvas!
DIY: Crayon Monogram
Pretty cute huh? Just another brilliant idea from Chic Cheap Nursery. Get your glue guns ready and get to work! Here's a little tip from me - I've seen lots of these floating around on Pinterest and none look as good as this one. Make sure if you decide to give it a go to plan out your colours. This one has a bit of a graduation of colour happening - without it the result looks a bit of a mess (in my humble opinion, but I'm kind of anal about such things). Love to see your results! x
Easy DIY Shelving: Genius and stunning too!
Aside from the fact that this easy DIY project is obviously grey, it also scores major points for it's clever design. The process is pretty simple too!
1. You'll need to plan and measure this out carefully before you begin cutting. You'll need:
*17 x lengths of square cut timber all cut to the width you want
*5 x lengths of raw pine the width you want your shelves and the profile of the gaps between your bars
*2 x lengths of timber to act as posts - your bars will attach to these so they need to be cut to the measurement of the following: the profile of your bars x # of bars + size of gaps x # of gaps. The shelves should snugly slot into the gaps between the bars and can be positioned anywhere along the width! Easy!
Hopefully those instructions are understandable. I'd really like to have a go at this one myself.
Sorry! I've no idea where I found this image. If it's yours let me know and I'll credit you.
Real room: Tammy's tribute to Madeline
Too cute huh? Tammy Mitchell did an outstanding job on the makeover of her daughters bedroom.
Hop over here for more pics and the rundown...
The DIY safety gate you'd actually want in your home...
Need to kid-proof a danger zone at your place? Finding the available options a little cringe-worthy on the design front? Well, here's a great little DIY from Blue Ant Studios that you'll be proud to hang and it won't leave you unhinged financially either! Hop over here for the step by step...
http://blueantstudio.blogspot.com/2006/08/homebrew-baby-safety-gate.html
Subscribe to:
Posts (Atom)